
Have you encountered an orange light glowing ominously on your motherboard? Don’t panic—this guide will walk you through common reasons and quick solutions to resolve this issue and get your system back up and running smoothly.
Understanding the Orange Light on Your Motherboard
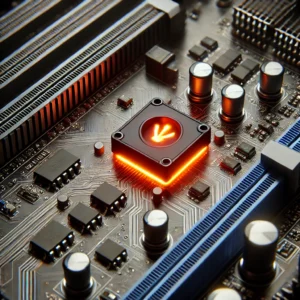
An orange light on your motherboard typically indicates a hardware or connectivity issue that needs attention. It’s crucial to diagnose the root cause before proceeding with any fixes. Here are some common reasons why your motherboard might display an orange light:
- Power Supply Issues: Insufficient power delivery or a faulty power supply unit (PSU) can trigger the orange light. Check connections and ensure your PSU meets the power requirements of your components.
- RAM Problems: Loose or improperly seated RAM modules can cause instability, leading to the orange light. Try reseating or replacing RAM sticks to see if the issue resolves.
- CPU Errors: Overheating or compatibility issues with the CPU can also trigger the motherboard’s orange light. Ensure your CPU cooler is functioning correctly and that the CPU is compatible with your motherboard.
- Graphics Card Issues: A faulty or incorrectly installed graphics card can cause the motherboard to display an orange light. Check the GPU connections and try reseating the card.
- BIOS Errors: Corrupted BIOS settings or outdated firmware can sometimes manifest as an orange light. Consider updating your motherboard’s BIOS to the latest version, following manufacturer guidelines.
Quick Solutions to Fix the Orange Light
Now, let’s delve into some quick solutions to address the orange light issue:
1. Check Power Supply Connections
- Ensure all power cables are securely connected to the motherboard and other components.
- Verify the PSU is supplying adequate power and isn’t faulty. Consider testing with a known-working PSU if available.
Here are steps that can help you check power supply connections:
Step 1: Power Off: Shut down your computer completely and unplug it from the power source.
Step 2: Inspect Connections: Check all power cables connected to the motherboard, CPU power socket, GPU, and other components.
Step 3: Reconnect Cables: Ensure each cable is securely plugged into its respective socket, avoiding loose connections.
Step 4: Test with Another PSU: If possible, test your system with a known-working power supply unit (PSU) to rule out a faulty PSU as the cause.
2. Reseat RAM Modules
- Power off your system and carefully remove and reinsert each RAM module.
- Ensure the RAM modules are properly seated in their slots and locked into place.
Here are steps that can help you reseat RAM Modules:
Step 1: Power Off : Turn off your computer and disconnect it from the power source.
Step 2: Access RAM Slots : Open your computer case to access the RAM slots on the motherboard.
Step 3: Remove RAM : Gently press down on the RAM module’s clips at both ends to release it from the slot.
Step 4: Reinsert RAM : Carefully reinsert the RAM module into the slot, ensuring it is fully seated and the clips click back into place.
Step 5: Repeat for Each Module : Repeat steps 3 and 4 for each RAM module installed in your system.
3. Verify CPU and Cooler Installation
- Check that the CPU is properly installed in its socket without any bent pins or thermal paste issues.
- Confirm that the CPU cooler is securely mounted and functioning correctly to prevent overheating.
Here are steps that can help you verify CPU and Cooler Installation:
Step 1: Power Off : Turn off your computer and unplug it from the power source.
Step 2: Inspect CPU : Remove the CPU cooler carefully to inspect the CPU for any signs of damage or bent pins.
Step 3: Clean and Apply Thermal Paste : If necessary, clean off old thermal paste using isopropyl alcohol and apply a fresh, pea-sized dot of thermal paste to the center of the CPU.
Step 4: Reinstall CPU : Align the CPU correctly in its socket, ensuring no pins are bent, and secure it by locking the CPU socket lever back into place.
Step 5: Reattach CPU Cooler : Carefully reattach the CPU cooler, ensuring it is properly aligned with the CPU and securely fastened to the motherboard.
4. Inspect Graphics Card
- Power down and reseat the graphics card in its slot.
- Ensure the GPU power cables are firmly connected and that the card is compatible with your motherboard.
Here are steps that can help you inspect Graphics Card:
Step 1: Power Off : Shut down your computer and disconnect it from the power source.
Step 2: Access Graphics Card : Open your computer case to access the graphics card installed in the PCI-Express slot.
Step 3: Remove Graphics Card : Gently press down on the release latch (if present) or unscrew the bracket holding the graphics card in place.
Step 4: Reseat Graphics Card: Carefully reinsert the graphics card into the PCI-Express slot, ensuring it is fully seated and the release latch clicks back into place.
Step 5: Secure Bracket : Reattach any screws or brackets that secure the graphics card to the case.
5. Update BIOS Firmware
- Visit the motherboard manufacturer’s website and download the latest BIOS firmware for your specific model.
- Follow the manufacturer’s instructions to update the BIOS using a USB drive or online utility provided.
Here are steps that can help update BIOS Firmware:
Step 1: Download BIOS Update : Visit the motherboard manufacturer’s website and locate the latest BIOS firmware update for your specific motherboard model.
Step 2: Prepare USB Drive : Format a USB drive to FAT32 format and copy the downloaded BIOS update file onto it.
Step 3: Enter BIOS Setup : Restart your computer and enter BIOS setup by pressing a specific key during boot (usually Del, F2, or Esc).
Step 4: Update BIOS : Follow the on-screen instructions or refer to the motherboard manual to update BIOS firmware using the USB drive.
Step 5: Reboot : Once the BIOS update is complete, restart your computer and check if the orange light issue is resolved.
What do motherboard light colors mean?
Motherboard lights come in various colors, and each color typically signifies different statuses or issues within your system. Here’s a general guide to what motherboard light colors commonly mean:
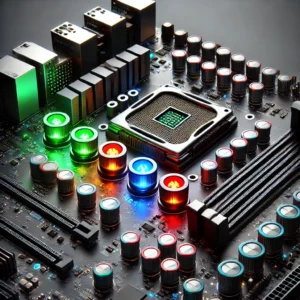
- Green: A steady green light often indicates that the motherboard is receiving power and functioning normally.
- Red: A red light can indicate several issues, including CPU or RAM errors, overheating, or critical hardware failures. Check your motherboard’s manual for specific meanings.
- Yellow or Orange: These colors often indicate less severe issues compared to red lights. They might signify warnings about hardware issues, such as power supply problems, RAM instability, or BIOS errors.
- White or Blue: Some motherboards use white or blue lights to indicate specific statuses or conditions, such as system standby mode or data transfer activities.
- Flashing Lights: A flashing light, regardless of color, usually indicates activity, such as data transfer or system booting processes.
Conclusion
By following these troubleshooting steps, you should be able to diagnose and resolve the orange light issue on your motherboard efficiently. If the problem persists despite these efforts, it may indicate a more serious hardware fault requiring professional inspection.
Remember, always handle hardware components with care to avoid damage. If you’re unsure about performing any of these steps, consult your motherboard’s manual or seek assistance from a qualified technician.
For more in-depth tech guides and product reviews, visit PC Gears Den. Stay informed and proactive to keep your system running smoothly and efficiently. Have you encountered an orange light on your motherboard before? Share your experience and tips in the comments below!
Want to learn about Top 10 Best GPUs for AI in 2024. Then click here.
FAQs
- Q1: Why is there an orange light on my motherboard?
- An orange light typically indicates hardware issues like power supply problems, RAM issues, or CPU errors. Our guide can help diagnose and fix these issues.
- Q2: How do I know if my motherboard’s orange light is serious?
- While an orange light can signify various issues, it’s crucial to check connections and follow troubleshooting steps. Consult your motherboard manual or seek professional help if unsure.
- Q3: Can updating BIOS fix the orange light issue?
- Yes, updating BIOS firmware can resolve compatibility issues and improve system stability, potentially fixing the orange light issue on your motherboard. Always update BIOS carefully.