Repasting your GPU can significantly enhance its performance and life span by guaranteeing an optimal thermal conductivity. As time goes by, the thermal paste that is found in between the GPU and its heat sink may become dry and therefore, loose its efficiency. This tutorial takes you through how to repaste your GPU effectively for it to remain cool as well as allowing your graphics card to work properly.
Why Repasting Your GPU is Important
When it comes to the heat dissipation system in your graphic processing unit, thermal paste, also called thermal compound, plays a major role. This paste works by filling the nano-sized cavities that exist between the CPU and the heat sink hence facilitating better transfer of heat between them. In case this substance dries out over time, then extreme temperatures may occur and cause throttling. By repasting your GPU you will be able to:
Boost thermal performance: Lower temperatures means higher performance as well as stability.
Expand the longevity of your GPU: Cooler operating temperature results to decreased wearing away or spoiling of components.
Prevent thermal throttling: Keep on performing at its best condition without slowing down its speed so that it can cool itself off.

Tools You Will Need
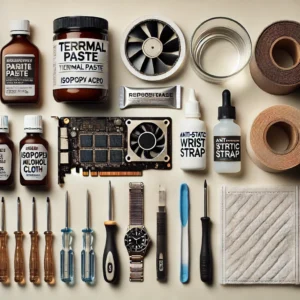
Before you start, gather the necessary tools and materials:
- Thermal paste: High-quality thermal paste like Arctic Silver 5 or Noctua NT-H1.
- Isopropyl alcohol: 90% or higher concentration for cleaning the old paste.
- Microfiber cloth or coffee filters: For cleaning purposes.
- Screwdrivers: Typically, Phillips-head and Torx screwdrivers are needed.
- Anti-static wrist strap: To prevent static damage to your components.
- Plastic spudger: For gently prying apart components.

Step-by-Step Guide to Repasting Your GPU
Step 1: Preparation
Power down and unplug your computer: Make sure your machine is completely turned off and disconnected from all power sources.
Ground yourself: Use an anti-static wristband to avoid static electricity damaging your GPU.
Remove the GPU: Open up the computer case and gently remove your GPU from the PCI- E slot it was installed on.
Step 2: Disassemble the GPU
Remove the screws: Unscrew the screws holding the GPU cooler in place using a suitable screwdriver at the back of a typical GPU.
Detach the cooler: Carefully remove the cooler from its position overlying that of GPU memory modules or VRM’s, being cautious enough to remember unplugging fan cables if any.
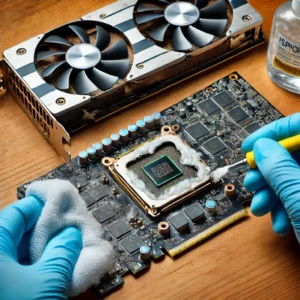
Remove old thermal paste: Take some quantities of rubbing alcohol on a microfiber cloth or coffee filter and use it to wipe away dried up thermal pastes from both surfaces of a graphic card as well as coolers.
Step 3: Apply New Thermal Paste
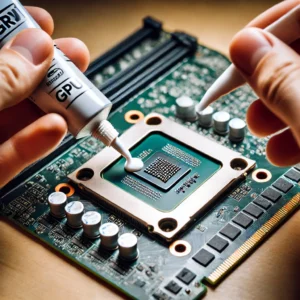
Apply little thermal paste: Place small pea size dot of thermal paste right at middle part of GPU die. It is important not to apply more as this can cause overspill leading to ineffective cooling process.
Spread the paste (optional): While some prefer evenly spreading by means of plastic card or dedicated spreader, many pastes are such that they gradually spread when pressured out/on themselves without much intervention required for distribution purposes or else simply melt into thin layer.
Step 4: Reassemble The GPU
Reattach Cooler: Be cautious enough while putting back cooler onto gpu making sure that it sits properly upon gpu board surface itself within which multiple ports pins are placed before securing through its screws once again .
Secure screws: Tighten these screws in crisscross pattern so as to ensure uniform stress application across entire surface area occupied by actual silicon material chip on which electric current flows depending upon instructions sent by operating system as generated by various running applications.
Reconnect any fan cables: Make sure you reconnect all the cables as they were before.
Step 5: Reinstall The GPU
Put gpu into the pci-e slot again: Gently reinsert the graphic card back to where it was situated when removed from motherboard.
Secure GPU: Use screws in securing Graphic Processing Unit into its initial position on a personal computer; these fasteners serve to anchor or tightly hold it down making sure that nothing much is likely to come off easily without your awareness and also getting rid of any vibrations or unnecessary wobbling movements which may cause both damages or even short circuits thereof.
Shut down your case properly: Ensure all flip-overs are well latched.
Step 6: Test Your GPU
Power up your computer: Connect and power your machine simultaneously.
Monitor temperatures: These could be checked with software aids such as MSI Afterburner, HWMonitor and others just to be certain that graphics card temperature is lower than was previously believed earlier on.

Additional Tips for Repasting GPU
Get the right thermal paste: All pastes are not equal. Investigate and choose the best quality one for superior outcomes.
Regular maintenance: Rethink about repasting your GPU after every 12-24 months, depending on usage and thermals.
Stay informed: Read reputable tech blogs and forums to know more about GPU cooling techniques and updates on maintenance.
For those interested in comparing GPU performance, check out this detailed comparison of the Nvidia GeForce GTX 1060 vs 970.
Repasting your GPU might seem daunting at first, but with the right tools and a careful approach, it’s a straightforward process that can yield significant benefits. Happy repasting!
FAQs
Q: What is the purpose of repasting a GPU?
A: Repasting a GPU involves applying new thermal paste to improve heat transfer between the GPU and its heat sink. This helps lower temperatures, enhance performance, and extend the lifespan of the GPU.
Q: How often should I repaste GPU?
A: It is recommended to repaste your GPU every 1-2 years, depending on usage and thermal performance. Regular maintenance can help maintain optimal cooling and prevent overheating.
Q: What thermal paste should I use for repasting GPU?
A: High-quality thermal pastes such as Arctic Silver 5 or Noctua NT-H1 are recommended for repasting your GPU. These pastes offer excellent thermal conductivity and long-lasting performance.
Q: Can repasting my GPU void its warranty?
A: Repasting your GPU can potentially void its warranty, depending on the manufacturer’s policy. It’s important to check the warranty terms before proceeding with the repasting process.
