Are you a PC gamer, video editor, or cryptocurrency miner? If so, you probably understand the importance of keeping your GPU (Graphics Processing Unit) cool. Overheating can not only lead to performance issues but also potentially damage your valuable hardware. One way to combat this problem is by effectively controlling your GPU fan speed. In this guide, we’ll explore various methods to help you keep your GPU temperatures in check.
Before we get into more details of fan speed control, let’s discuss GPU fan speed and why it matters. The fan speed of your GPU influences how fast the fans spin to eliminate heat. If your GPU overheats, it might cause performance throttling or even permanently damage. Running your fans at full power all the time, on the other hand, might cause unnecessary noise and wear.
Why Controlling GPU Fan Speed is Important?
Before delving into the methods of controlling GPU fan speed, let’s first understand why it’s crucial. GPUs generate a significant amount of heat during their operation, especially when handling resource-intensive tasks like gaming or rendering. If not properly cooled, the heat can cause your GPU to throttle its performance or, worse, become damaged. That’s where GPU fan speed control comes in handy. By regulating the fan speed, you can maintain optimal temperatures, ensuring consistent performance and prolonging the lifespan of your GPU.
So let’s dive into this article so that you can check various ways of controlling GPU fan speed and can get the best performance from you PC.
1. Manual vs. Automatic Fan Speed Control
There are two primary ways to control GPU fan speed: manually or automatically.
Manual Control:
- MSI Afterburner: One of the most popular tools for manual fan speed control is MSI Afterburner. This software allows you to adjust fan speed settings with ease. You can create custom fan speed curves, ramping up the fan speed when your GPU gets hot and reducing it when the load is lighter. This level of customization ensures efficient cooling while minimizing unnecessary fan noise.
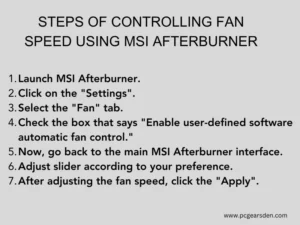
To check GPU fan speed using MSI Afterburner, follow these steps:
- Launch MSI Afterburner on your computer.
- Click on the “Settings” icon, often represented as a gear or wrench.
- In the Settings window, select the “Fan” tab.
- Check the box that says “Enable user-defined software automatic fan control.” This allows you to manually adjust the fan speed.
- Now, go back to the main MSI Afterburner interface.
- You will see a graph or slider for fan speed. Adjust it according to your preference to increase or decrease the GPU fan speed.
- You can also create a custom fan curve by clicking on the “Curve” button, which allows you to set specific fan speeds at different temperature levels.
- After adjusting the fan speed, click the “Apply” button to save the changes.
MSI Afterburner will now control your GPU fan speed based on your settings. This can help you optimize cooling performance and reduce noise levels when needed.
Automatic Control:
- GPU Drivers: Most graphics card manufacturers provide GPU driver software that includes automatic fan speed control. These drivers can adjust fan speeds based on real-time temperature data, ensuring your GPU remains at safe operating temperatures without requiring manual intervention.
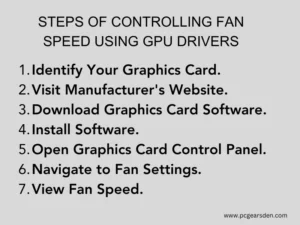
Checking GPU fan speed using GPU drivers can vary depending on your graphics card manufacturer and the software you use. Here are general steps:
- Identify Your Graphics Card: Determine the brand and model of your GPU (e.g., NVIDIA or AMD).
- Visit Manufacturer’s Website: Go to the official website of your GPU manufacturer (NVIDIA or AMD).
- Download Graphics Card Software: Download the appropriate software for your graphics card. For NVIDIA, it’s usually “NVIDIA Control Panel,” and for AMD, it’s “AMD Radeon Software.”
- Install Software: Install the downloaded software on your computer.
- Open Graphics Card Control Panel: Launch the installed software (e.g., NVIDIA Control Panel or AMD Radeon Software).
- Navigate to Fan Settings: Look for fan settings within the software’s control panel. It may be under “Performance,” “Cooling,” or a similar section.
- View Fan Speed: In the fan settings, you should be able to see the current fan speed of your GPU. It may be displayed in RPM (Revolutions Per Minute) or as a percentage.
2. Using AMD Radeon Software, WattMan

If you own an AMD graphics card, you may discover that AMD’s default graphics driver software includes an amazing detailed panel for GPU fan speed and control!
WattMan, like Afterburner, allows users with the ability to fine-tune and optimize their GPU’s performance, fan speed, voltage, and more.
AMD Radeon WattMan provides a user-friendly interface to monitor and control your GPU’s fan speed. Here are the steps to check GPU fan speed using AMD Radeon WattMan:
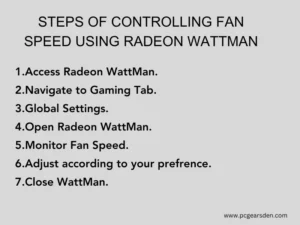
1.Access Radeon WattMan:
- Right-click on your desktop to open the context menu.
- Select “AMD Radeon Settings.”
2.Navigate to Gaming Tab:
- In the Radeon Settings window, click on the “Gaming” tab located at the top.
3.Global Settings:
- Within the “Gaming” tab, click on “Global Settings” on the left-hand side.
4.Open Radeon WattMan:
- Find and click on the “Global WattMan” option in the “Global Settings” section. This will open the WattMan interface.
5.Monitor Fan Speed:
- In the WattMan interface, you’ll see various settings for your graphics card.
- Look for the “Fan Speed (RPM)” section. Here, you can view the current fan speed of your GPU.
6.Additional Information:
- Alongside fan speed, you can also monitor other important GPU parameters like temperature, GPU clock speed, and memory clock speed within the WattMan interface.
7.Close WattMan:
- Once you’ve checked the fan speed and other GPU parameters, you can close the WattMan interface.
3. Adjusting GPU Fan Speed in the BIOS
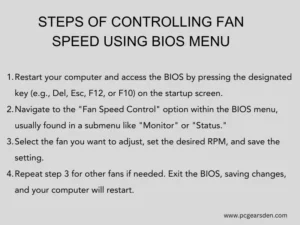
Most modern computer motherboards include pulse-width modulation controllers for controlling the revolutions per minute of the internal cooling fans. Whether one of your business computers is overheating or simply running hot, increasing the fan speed will enhance internal ventilation, allowing your computer to cool down. The BIOS menu is where you may change the fan speed. Below are the steps to adjust fan speed using BIOS menu:
1. Restart the computer and look for the first Power-On Self-Test startup screen. To enter the BIOS, press the button provided onscreen. The button’s title is commonly “Del,” “Esc,” “F12,” or “F10,” but it varies depending on the motherboard manufacturer.
2. Use your keyboard’s arrow keys to navigate through the BIOS menu to the “Monitor,” “Status,” or other similarly titled submenu (this will vary slightly by manufacturer). To access the fan controls, select “Fan Speed Control” from the submenu.
3. Scroll down the page to the “Fan Speed Control” section. The RPM settings for the computer fans are found in this section. Select the fan you want to activate and hit “Enter.” To save the setting, select the desired speed from the list (for example, “600 RPM” or “700 RPM”) and click “Enter” again. It’s worth noting that the motherboard’s PWM controller won’t let you go any faster than the fan’s rated speed.
4. Repeat the preceding process for each fan whose speed you want to raise. When finished, press the “Esc” button repeatedly until you see the “Exit” menu. To finalize the fan speed settings, select the “Save Changes and Reset” option; your computer will now restart.
Thoughts and Recommendations
As we wrap up our comprehensive guide on effectively controlling GPU fan speed, it’s essential to reflect on some key thoughts and provide valuable recommendations. For effective GPU fan speed control is an essential aspect of maintaining optimal performance and extending the lifespan of your graphics card. By finding the right balance between cooling and noise, using reliable software like MSI Afterburner, Radeon Wattman and following these recommendations, you can ensure that your GPU stays cool under pressure. So, take control of your GPU’s temperature, enjoy smoother gaming and computing experiences, and protect your valuable hardware investment.
FAQs
1. Can I damage my GPU by adjusting the fan speed too high?
- While it’s unlikely to damage your GPU by setting the fan speed too high, it can reduce the fan’s lifespan and create excessive noise. It’s essential to strike a balance for optimal performance.
2. Does controlling GPU fan speed impact power consumption significantly?
- Yes, running fans at higher speeds can increase power consumption slightly. However, the impact on your overall electricity bill is generally minimal.
3. Are third-party fan control software safe to use?
- Many reputable third-party software options are safe to use. However, exercise caution and ensure you download from trusted sources to avoid potential malware.
4. How often should I clean my GPU fans?
- Cleaning your GPU fans every few months or whenever you notice dust buildup is a good practice. It helps maintain optimal cooling and reduces fan noise.