Table of Contents
ToggleDisable GPU Overclocking
Disable GPU overclocking means resetting the graphics processing unit (GPU) to its original factory settings. Overclocking involves increasing the GPU’s clock speed beyond its default rate to achieve better performance, which can lead to higher frame rates in games or faster processing in graphics-intensive applications. However, overclocking also increases power consumption, heat output, and the risk of hardware instability or damage.
So, If you’ve been tinkering with your GPU settings, you might have ventured into the realm of overclocking. Overclocking can boost performance, but sometimes it’s necessary to revert these changes to ensure system stability and longevity. In this guide, we’ll walk you through the process of disabling GPU overclocking safely. Let’s dive in!
Why Disable GPU Overclocking?
Overclocking pushes your GPU beyond its factory settings to achieve better performance. However, this can lead to increased heat, instability, and potentially reduced lifespan of your hardware. Disabling overclocking can help:
- Enhance Stability: Prevent crashes and system instability.
- Reduce Heat: Lower temperatures can extend the lifespan of your GPU.
- Conserve Energy: Decrease power consumption, which is great for your electricity bill and the environment.
Preparing to Disable Overclocking
Before you start, it’s crucial to back up your current settings. This way, if anything goes wrong, you can easily revert to your previous configuration. Most overclocking software allows you to save your settings profile.
Step-by-Step Guide to Disabling GPU Overclocking

Step 1: Open Your Overclocking Software
The first step is to open the software you used to overclock your GPU. Popular options include MSI Afterburner, EVGA Precision X, and ASUS GPU Tweak.
Step 2: Reset to Default Settings
Look for the option to reset settings to default. This option is usually prominently displayed in the user interface. Here’s how to do it in some common programs:
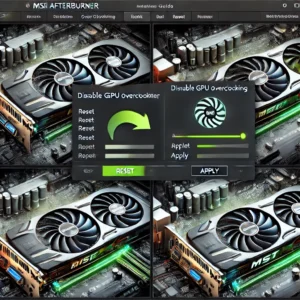
- MSI Afterburner: Click the “Reset” button.
- EVGA Precision X: Press the “Default” button.
- ASUS GPU Tweak: Click on the “Default” button.
Step 3: Apply the Changes
After resetting to default settings, make sure to apply the changes. This might involve clicking an “Apply” button or confirming a prompt.
Step 4: Restart Your Computer
Restarting your computer ensures that all changes are applied correctly and that your GPU operates with its default settings.
Step 5: Monitor Your GPU
Once your computer has restarted, monitor your GPU to ensure it’s running as expected. Use tools like GPU-Z or HWMonitor to check temperatures and performance.
Additional Tips for Managing Your GPU
Keep Your Drivers Updated
Always ensure your GPU drivers are up-to-date. Updated drivers can improve performance and stability. Visit your GPU manufacturer’s website for the latest drivers.
Maintain Good Cooling
Proper cooling is essential for GPU health. Ensure your PC case has good airflow and consider cleaning out any dust that might have accumulated.
Consider Liquid Cooling
For those looking for efficient cooling solutions, liquid cooling can be an excellent option. Check out our Best Budget-Friendly Graphics Cards with Liquid Cooling in 2024 for some great options.

Troubleshooting Common Issues
System Instability
If you experience instability after disabling overclocking, ensure all settings are correctly reverted to default. Sometimes, BIOS settings might also need to be reset.
High Temperatures
If your GPU is still running hot, double-check your cooling setup. Ensure all fans are working correctly and that there’s no dust blocking airflow.
Risks Associated With Overclocking a GPU
Overclocking might seem helpful, but it can potentially harm your GPU. Here are some risks:
- Overheating: Your graphics card can get too hot, causing your computer to malfunction or crash.
- System Errors: It can lead to various system or driver errors.
- Increased Power Consumption: It uses more power than usual.
- Data Damage: It can harm the data and files on your computer.
- Shortened Lifespan: It can shorten your GPU’s lifespan and affect its performance.
To minimize these risks, use cooling solutions, monitor the system’s temperature closely, and avoid pushing the speed too high.
Conclusion
Disabling GPU overclocking is a straightforward process that can help maintain system stability and longevity. By following these steps, you can ensure your GPU runs smoothly and efficiently. Remember to back up your settings before making changes and monitor your GPU’s performance after disabling overclocking. Happy gaming!
FAQs
1. What is GPU overclocking, and why would I want to disable it?
GPU overclocking involves pushing your graphics card beyond its default settings to achieve better performance. You might want to disable GPU overclocking to enhance system stability, reduce heat, and conserve energy, especially if you experience crashes or overheating issues.
2. How do I reset my GPU to default settings using MSI Afterburner?
To reset your GPU to default settings using MSI Afterburner, open the software and click the “Reset” button. This will revert all overclocked settings to their factory defaults. Make sure to apply the changes and restart your computer to ensure the settings take effect.
3. Can disabling GPU overclocking improve my computer’s performance?
Disabling GPU overclocking can improve your computer’s stability and longevity. While you might see a slight drop in performance, the trade-off is often worth it for the reduced risk of crashes and overheating, leading to a smoother overall experience.
4. Are there any risks associated with disabling GPU overclocking?
Disabling GPU overclocking is generally safe and can help prevent potential issues related to overheating and instability. However, it’s important to back up your current settings before making any changes to easily revert if needed. Always follow the steps carefully to avoid any mishaps.
