
Installed New GPU And No Display
Installing a new GPU should be an exciting upgrade to your system, but nothing dampens that excitement faster than a blank screen. If you’ve recently installed a new GPU and are greeted by no display, don’t panic. This guide will walk you through some easy fixes that can get your system up and running in no time.
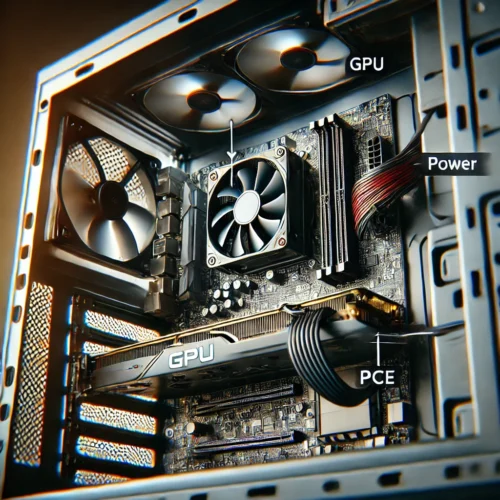
When you install a new GPU and experience no display, it typically happens due to several underlying reasons. One common issue is improper power connections; if the GPU isn’t receiving enough power or if the connectors are not securely attached, it won’t function properly. Another possible cause is that the GPU isn’t seated correctly in the PCIe slot, which can prevent it from making the necessary connections with the motherboard.
Driver compatibility issues can also lead to a blank screen. If the system doesn’t have the correct drivers installed, the new GPU might not be recognized, resulting in no display. Additionally, monitor and cable issues might be the culprit; sometimes, the display problem stems from the monitor itself or the cables connecting it to the GPU.
Lastly, BIOS/UEFI settings or incompatibility with the motherboard can prevent the GPU from displaying. In some cases, older motherboards may require a BIOS update to support newer GPUs, and if these settings aren’t configured correctly, the GPU might not work as expected.
Here are several ways you can identify and fix these no display issues.
1. Check the Power Connections
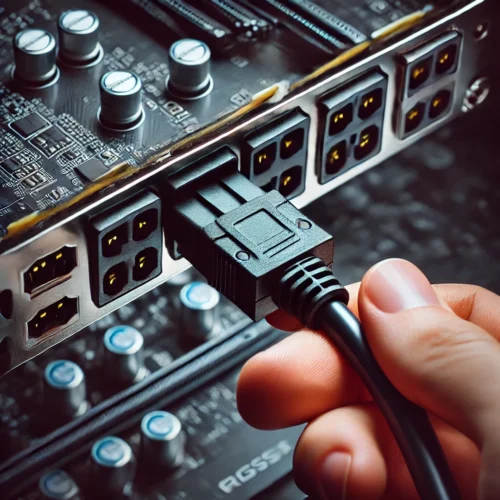
One of the most common reasons for a new GPU not displaying anything is a loose or incomplete power connection. Ensure that all power cables are securely connected to your GPU. Most modern GPUs require one or more PCIe power connectors, which come directly from your power supply. If these aren’t connected properly, your GPU won’t function. Double-check to ensure the connectors are fully seated and that you’re using the correct cables.
Here’s a step-by-step guide to check the power connections for your GPU:
- Power Down Your Computer
- Open Your Computer Case
- Locate the GPU
- Check the PCIe Power Cables
- Ensure Cables Are Fully Seated
- Verify the Power Supply Connections
- Double-Check the Connections
- Close the Case and Power Up
2. Update or Reinstall Drivers
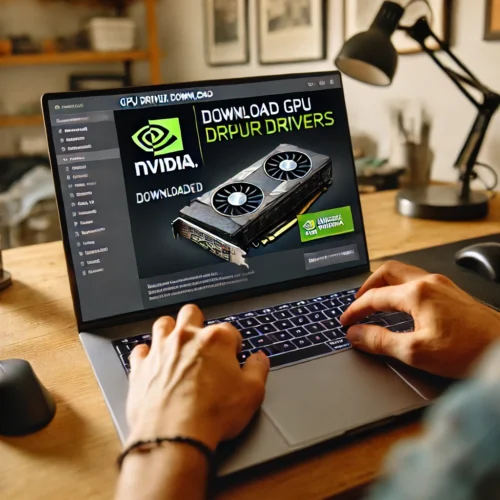
Outdated or incompatible drivers can also cause display issues. If you have access to an integrated GPU or an old GPU, use that to boot up your computer and download the latest drivers for your new GPU from the manufacturer’s website. Install the drivers, shut down the computer, and reinstall the new GPU. Sometimes, performing a clean installation of the drivers can resolve any lingering compatibility issues.
Here’s a list of websites where you can download or update the latest GPU drivers:
- NVIDIA Official Website
- AMD Official Website
- Intel Official Website
- GeForce Experience (NVIDIA)
- Windows Update (Microsoft)
- ASUS Official Website
- MSI Official Website
- Gigabyte Official Website
- EVGA Official Website
- Driver Booster by IObit
These websites provide the latest drivers for various GPUs, including those from NVIDIA, AMD, and Intel. Always ensure you’re downloading drivers directly from the manufacturer or a trusted source.
3. Check the Monitor and Cable Connections
It might seem obvious, but sometimes the issue isn’t with the GPU at all. Ensure that your monitor is powered on and connected correctly to the GPU. Try using a different cable or a different port on the GPU. Also, check the input source on your monitor to make sure it’s set to the correct connection type (HDMI, DisplayPort, etc.).
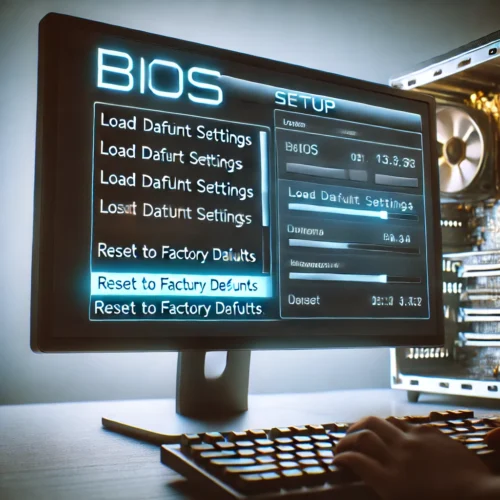
4. Reset the BIOS
In some cases, your system’s BIOS may not recognize the new GPU. Resetting the BIOS to its default settings can help. Here’s a step-by-step guide to reset the BIOS:
- Power down your system.
- Locate the CMOS battery on the motherboard.
- Remove it for about 5 minutes.
- Then reinstall it.
Alternatively, you can use the BIOS reset jumper if your motherboard has one. Once reset, your system will re-detect all hardware, including the new GPU.
5. Test the GPU in a Different System
If you’ve tried all the above steps and still get no display, the issue might be with the GPU itself. Testing the GPU in a different, compatible system can help you determine if the problem lies with the card. If the GPU fails to work in another system, you may need to consider a replacement or RMA (Return Merchandise Authorization) with the manufacturer.

6. Check for BIOS/UEFI Compatibility
Some older motherboards may not support newer GPUs without a BIOS or UEFI update. Check your motherboard’s manufacturer website for any available updates. If an update is available, carefully follow the instructions to flash your BIOS. Be aware that flashing the BIOS can be risky, so ensure you understand the process before proceeding.
7. Ensure Proper Display Output Selection
Some GPUs come with multiple display outputs (e.g., HDMI, DisplayPort, DVI). Ensure that you are using the correct output for your monitor. Sometimes, a display may not show if it’s connected to a secondary port that isn’t enabled by default. If you’re unsure, try connecting your monitor to each available port one by one until you find the correct one.
8. Check for Motherboard Issues
In some cases, the problem might be with the motherboard. Some motherboards have multiple PCIe slots, and not all of them provide the same performance. Try moving the GPU to another PCIe slot. If your motherboard has onboard graphics, try disabling them in the BIOS to force the system to use the GPU.
9. Consider PSU Limitations
A new, powerful GPU might require more power than your current power supply can provide. Check the wattage rating of your PSU and compare it to the GPU’s requirements. If your PSU is underpowered, upgrading to a higher wattage unit might resolve the issue.
Here’s a step-by-step guide on how to check the wattage rating of your PSU (Power Supply Unit):
- Power Down Your Computer
- Open Your Computer Case
- Locate the Power Supply Unit (PSU):
- The PSU is usually located at the bottom or top rear of the computer case. It’s a metal box with a fan and various cables coming out of it, connected to different components inside your computer.
- Check the PSU Label:
- Most PSUs have a label on one of the sides that lists important specifications, including the wattage rating. Look for a number followed by “W” (e.g., 500W, 650W, 750W). This number indicates the wattage rating of your PSU.
- Note the Total Wattage:
- The total wattage listed on the label is the maximum power output of the PSU. This is the number you need to compare with the power requirements of your components, especially your GPU.
- Close the Case
- Reconnect and Power On:
- Plug your computer back into the wall outlet and power it on. You now know the wattage rating of your PSU, which can help you determine if it’s sufficient for your components.
Conclusion
Experiencing no display after installing a new GPU can be frustrating, but with the right steps, you can diagnose and fix the problem. Remember, each of these fixes is designed to be straightforward and easy to follow. By methodically working through these solutions, you’ll increase your chances of getting your system up and running without much hassle.
For additional troubleshooting tips, especially if your GPU fans aren’t spinning, check out our detailed guide: Why My GPU Fans Are Not Spinning?.
FAQs
Q: Why isn’t my GPU showing display?
A: If your GPU isn’t showing a display, it could be due to a variety of reasons. Common causes include improper power connections, incorrect seating in the PCIe slot, outdated or missing drivers, or an issue with the monitor or cables. Ensuring that all connections are secure and that the GPU is properly installed can often resolve the issue.
Q: Why isn’t my new GPU showing up?
A: A new GPU might not show up due to driver incompatibility, BIOS settings, or an issue with the motherboard. It’s essential to check that the latest drivers are installed and that the GPU is properly seated in the PCIe slot. Additionally, updating your BIOS or ensuring that the power supply is adequate for the new GPU can help.
Q: Why is there no display when changing GPU?
A: No display after changing a GPU is often related to power issues, improper installation, or outdated drivers. Double-check that the power cables are correctly connected to the GPU and that it’s fully seated in the PCIe slot. Also, ensure that the monitor is connected to the correct output port on the GPU and that the drivers are up to date.
Q: Why is my GPU black screen?
A: A black screen with your GPU could be due to several factors, including loose power connections, incorrect driver installation, or a BIOS setting that doesn’t recognize the new hardware. Verify that all connections are secure, reinstall the drivers if necessary, and consider resetting the BIOS to ensure it recognizes the GPU.